|
Home | Previous | Next
AVI-Overhead | Open |
Select Audio A |
Total File Size |
Select Aspect Ratio |
Set Credits Start |
Compressibility Check | Encoding
The Encoding Process
AVI-Overhead
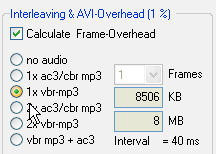
Select the Bitrate tab
in Gordianknot. Go to the Interleaving
& AVI Overhead box and select 1x vbr mp3.
This will prevent your movie from becoming larger than the actual video
and audio sizes added together. This is a one time setup so will not have
to be done again.
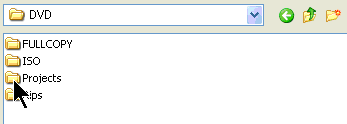
Next Press the Open button
to load the DVD2AVI project file (.D2V).

Navigate to your Project folder and double click on the .d2v file.
This will open a new window showing the movie. Do
not close this window. You can put it in the background
by clicking on the original Gordian Knot screen or minimize it.
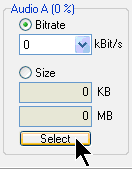
Select Audio A
Press the Select button for Audio A.
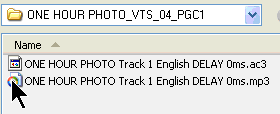
Navigate to to your project folder and double click on your .mp3 file.
Total File Size
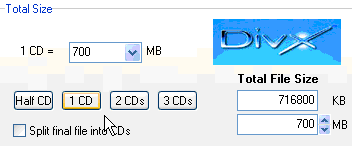
In the Total Size box, enter either the number of CDs
you want the movie to span across or you can type in the file size. You
can re-adjust this later after you do the compressibility check that I
explain later. If you are going to want to put the movie on a CD, check
the Split final file into CD's box. If you don't check
that box and make one large file, I will show you later how to split that
file to fit on multiple CDs. I always start by selecting
1 CD at 700 MB and then adjust it later to get the best quality/size movie.
Select Aspect
Ratio
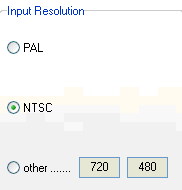
Now go to the Resolution tab. In the Input Resolution box,
Select NTSC.
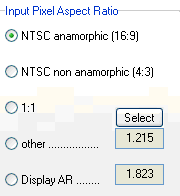
In the Input Pixel Aspect Ratio box, select the correct Aspect Ratio,
either wide screen (16:9) or full screen (4:3). This is usually written
on the back of the DVD box or on the DVD itself. To
be absolutely sure of the aspect ratio you can go to your Rip folder,
where the .vob files were ripped to, and double click on the 'stream information.txt'
file to view the video size. It will show either 16:9 or 4:3.
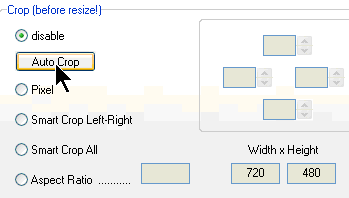
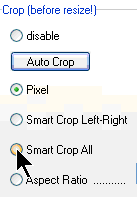
Next, in the Crop box, press the Auto Crop button.
Wait until there are numbers in the four squares to the right, then
select Smart
Crop All.
This will will give you the ideal crop values to minimize the aspect
ratio
error.
Set Credits Start
Now go back to the window that shows your video. Select the View tab
and select resized for the menu. This is a one time setup so will not have
to be done again.

Move your slider to the right to advance the movie to where your end credits
start. They you can press Set Credits Start. The credits will be encoded
at a lower quality which can slightly decrease your final file size. I
recommend against setting the Credits Start if video is displaying behind
the credits. Only set it if there is a solid black background behind the
credits, otherwise, you may miss out on some good quality bloopers, music
video or whatever else they may show during the credits.
Compressibility
Check
This is the last step to do before you start encoding. Press the Save & Encode button
on the window showing the movie.

The Save .avs screen will be displayed. At the bottom
of the screen, if you Set Credits Start in the last step, then select Both in
the Trim box. Otherwise, this area will be grayed out.

Next, select Use in the Compressibility Check box.
Then press Now.

The following screen will display.

Press OK and wait. When the compressibility check has finished, minimize
the movie window or put it in the background.
 It
took One Hour Photo about 8 minutes to finish. It
took One Hour Photo about 8 minutes to finish.
Move the slider in the Output
Resolution box so that the Aspect
Error is close to 0 (.3 +/- or below) keeping
the H-Zoom and W-Zoom greater
than 60%. As a rule
of thumb, I
start at the lowest Width that still has a H-Zoom and W-Zoom greater
than 60% and work my way up until I find an Aspect Error of
.3+/- or below.
I usually start at a width of 512 and work my way up or down from
there. This movie encoded at 544x288 looked great on my big screen TV.

Now comes the fun. Notice the values in the Bits/(Pixel*Frame).

Here the percentage is 82.8. To get optimal
results the percentage
should be between 40-60. To lower this value you can either decrease
the file
size by pressing the Total File Size down arrow on
the Bitrate tab or increase the output resolution by moving the slider (pictured
above) to the right, remembering to keep the Aspect
Error close
to 0. Also, here your Bits/(Pixel*Frame) are .235. You
want to keep
the B/(P*F) around .17
for
1 CD
and around .25 for
2 CDs. I
keep all my DivX movies on my hard drive so my goal is to have the
smallest file size possible with good quality so I can fit as many as I
can on my hard drive. (If you plan on copying several movies to a DVD,
this
would be your goal also.) So I would keep my resolution as is and decrease
my file size. As a rule of thumb, I decrease (or increase depending
on the movie and compressibility check) the size until either my percentage
reaches
50 or my B/(P*F) reaches .18. I never go below either
value unless the B/(P*F) is over .30 and the % is still less than 50%.
Then I keep the B(P*F) at .30 as long as the % is 40% or more.
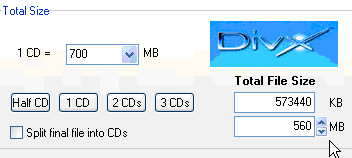

Here
you can see I decreased my file size from 700 MB to 560 MB to get my B/(P*F) down to .18. (If my percentage had
reached
50 before my B/(P*F) had reached .18, I would have stopped at 50% and
kept my B/(P*F) at whatever it was.)
With this example, I had to decrease my percentage and B/(P*F). Some movies require increasing these values. To do this
you can either increase the file size by pressing the up arrow or decrease
the output resolution by moving the slider to the left. If you decrease
the
output
resolution,
remember to keep the Aspect Error close to 0 and
to not go below a Width of 512. You may still need to
increase the file size to get the values in range.
If you were going to put the movie on a CD, you would want to increase
the resolution and keep the file size at 700 MB.
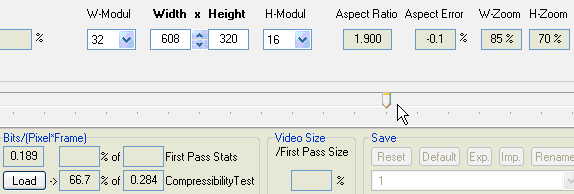
As you can see, by increasing the output resolution to 608x320 and still
keeping the Aspect Error close to 0, the B/(P*F) has
dropped close to .18.
Once you have your values set, it is time to encode.
Encoding
Go back to the window that shows your video. Press the Save & Encode button.
At the bottom of the Save .avs screen, press the Save & Encode button.
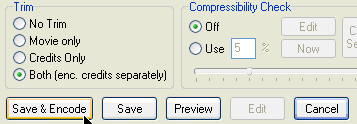
The Save Frameserver screen displays. Here you can change
the title of your movie if you want. I like to have
the rating included in my titles. Press Save.
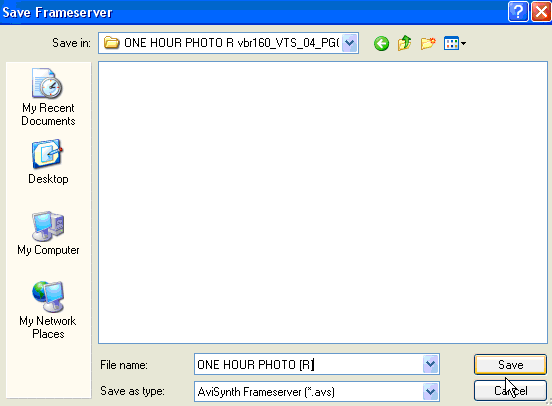
Next, the Save Credits Frameserver screen will display.
Press Save to continue. Next, the Control
Panel screen will display defaulting to the Audio
1 tab.
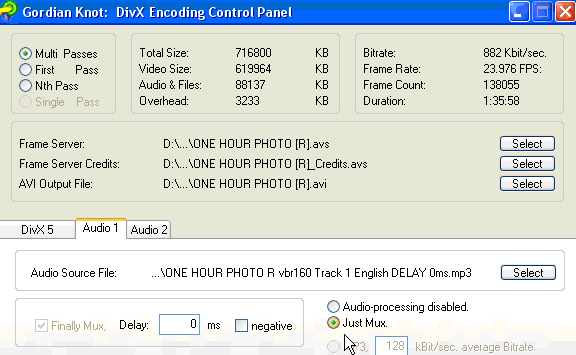
Select Just Mux then go to the DivX 5 tab.
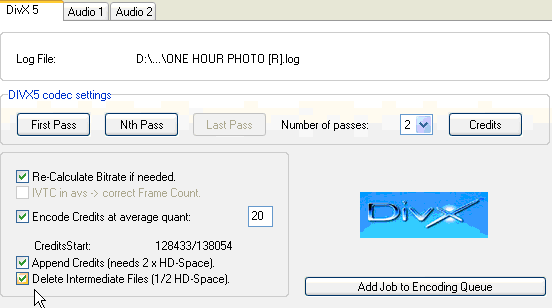
Select the Delete Intermediate Files box to save on disk
space then press the Add Job to Encoding Queue. The following
screen displays.

If you have only one movie to encode and you want to start it now, press Yes.
Otherwise, if you have more than one movie to setup or you want to start
encoding later, press No. The Gordianknot screen will
display, defaulting to the Encoder tab.
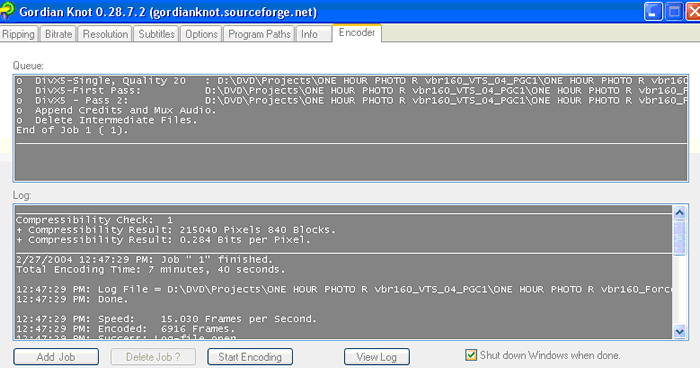
Here I selected "No" to start encoding now
and as you can see in the top part of the screen, it has been added to
the queue. If you want your PC
to shutdown when encoding has finished check the Shut down Windows
box. At this point, if you wanted to add more movies to encode, start
by selecting the Bitrate tab, opening the next .d2v
project file and following the same steps as before.
When you have added all the movies you want to encode, press the Start
Encoding button.
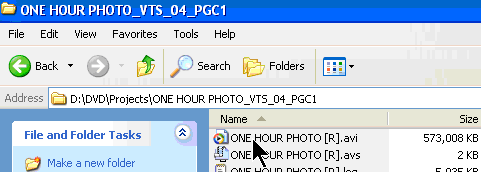
When the Encoding has completed, the DivX movie, with
the extension of .avi, will reside in the Projects folder. It typically
takes anywhere
from 2
1/2 to 3 1/2 hours per movie depending on the Total File Size and the
speed of your computer. It
took 2 hours and 40 minutes to encode One Hour Photo on a 1.6 GHZ processor.
On a 3.0 GHZ processor it takes about the same amount of time
to encode the move as the movie's normal playing time.
Previous | Next |
Top
|