How to Create a Text File Using Karen's Directory Printer
QUESTION: I have a wireless media PC that is on our home network. The PC is located in our family room connected to our TV. Using CinemaPremiere Online I want to add all the movies on my media PC to my CinemaPremiere database from my upstairs PC. I also want to be able to watch the movies located on my media PC from any computer in my house. How can I do that?
ANSWER: I have found a free program that will allow you to create a text file of all your movies on your media PC. Once you have the text file created, you would log in to your CinemaPremiere movie manager and go to Add > Import Txt.
- From you upstairs PC download and install Karen's Directory Printer program. Please install it to 'C:\Program Files\Karen's Power Tools\Directory Printer' which it will default to. This way, if you are running the movie manager through the CP Browser, you will be able to start Karen's Directory Printer from the Add > Imprt Txt screen.
- Start the program and select the 'Save to Disk' tab.
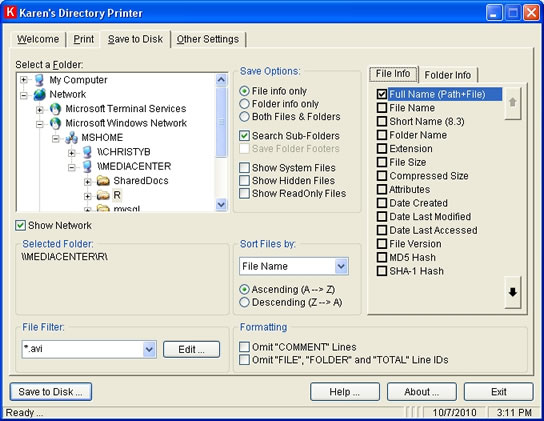
- Uner Save Options, select 'File info only' and 'Search Sub-Folders' if you have movies in sub folders.
- Under File Info, select only 'Full Name.'
- Under File Filter, press 'Edit' to add your movie file extension(s) to search for.
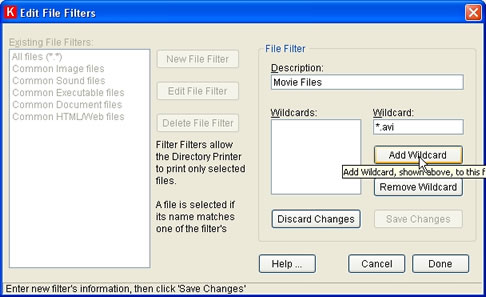
- Press 'New File Filter'
- Enter a description
- Enter a wildcard and press 'Add Wildcard'
- Press
Done when finished and save your changes
- Select your new file filter from the File Filter list.
- Select Show Network and navigate to your media PC movie folder. (Your movie folder must be shared)
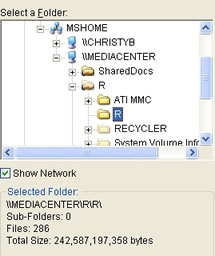
- Select 'Save to Disk' and save your text file.
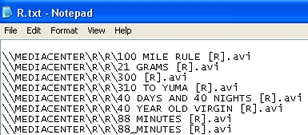
- Open the text file in Notepad or any text editor.
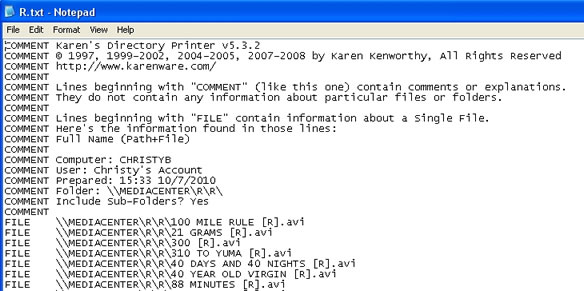
- Remove all COMMENT lines.
- Select Edit > Replace
- Copy and paste 'FILE ' into the Find what field and press 'Replace All'
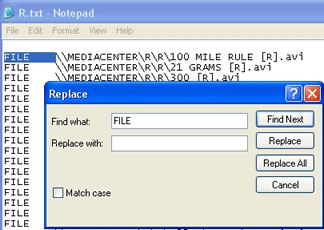
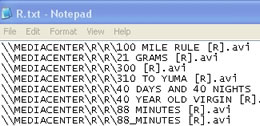
- You will be left with only the full path and file name.
- In the first 2 lines of the text file, you can optionally add the location and media type for all the movies. If you do not specify a location for the movies, the location field
for each movie will be blank. If you do not specify a media type, the media type will be the movie's file extension. You can read more about adding location and media type in the users manual.
- If you are not going to add a location or media type, remove the first blank line in the text file.
- Save the file.
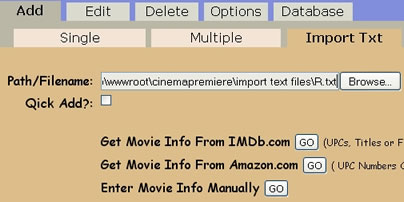
- In your movie manager, in Add > Import Txt, browse to your text file and press Go to import the movie information for each of your movies in your text file.
- Once your movies have been added, you can play your movies from any PC on your home network provided:
- You are running CinemaPremiere through the CP Browser. For security reasons, normal web browsers do not open movie files that reside on a user's PC. The CP Browser is acually an ebook reader that I have customized for CinemaPremiere to be able to play movie files.
- Your media PC is turned on and the movie folder is still shared.
- You have a fast internet connection.